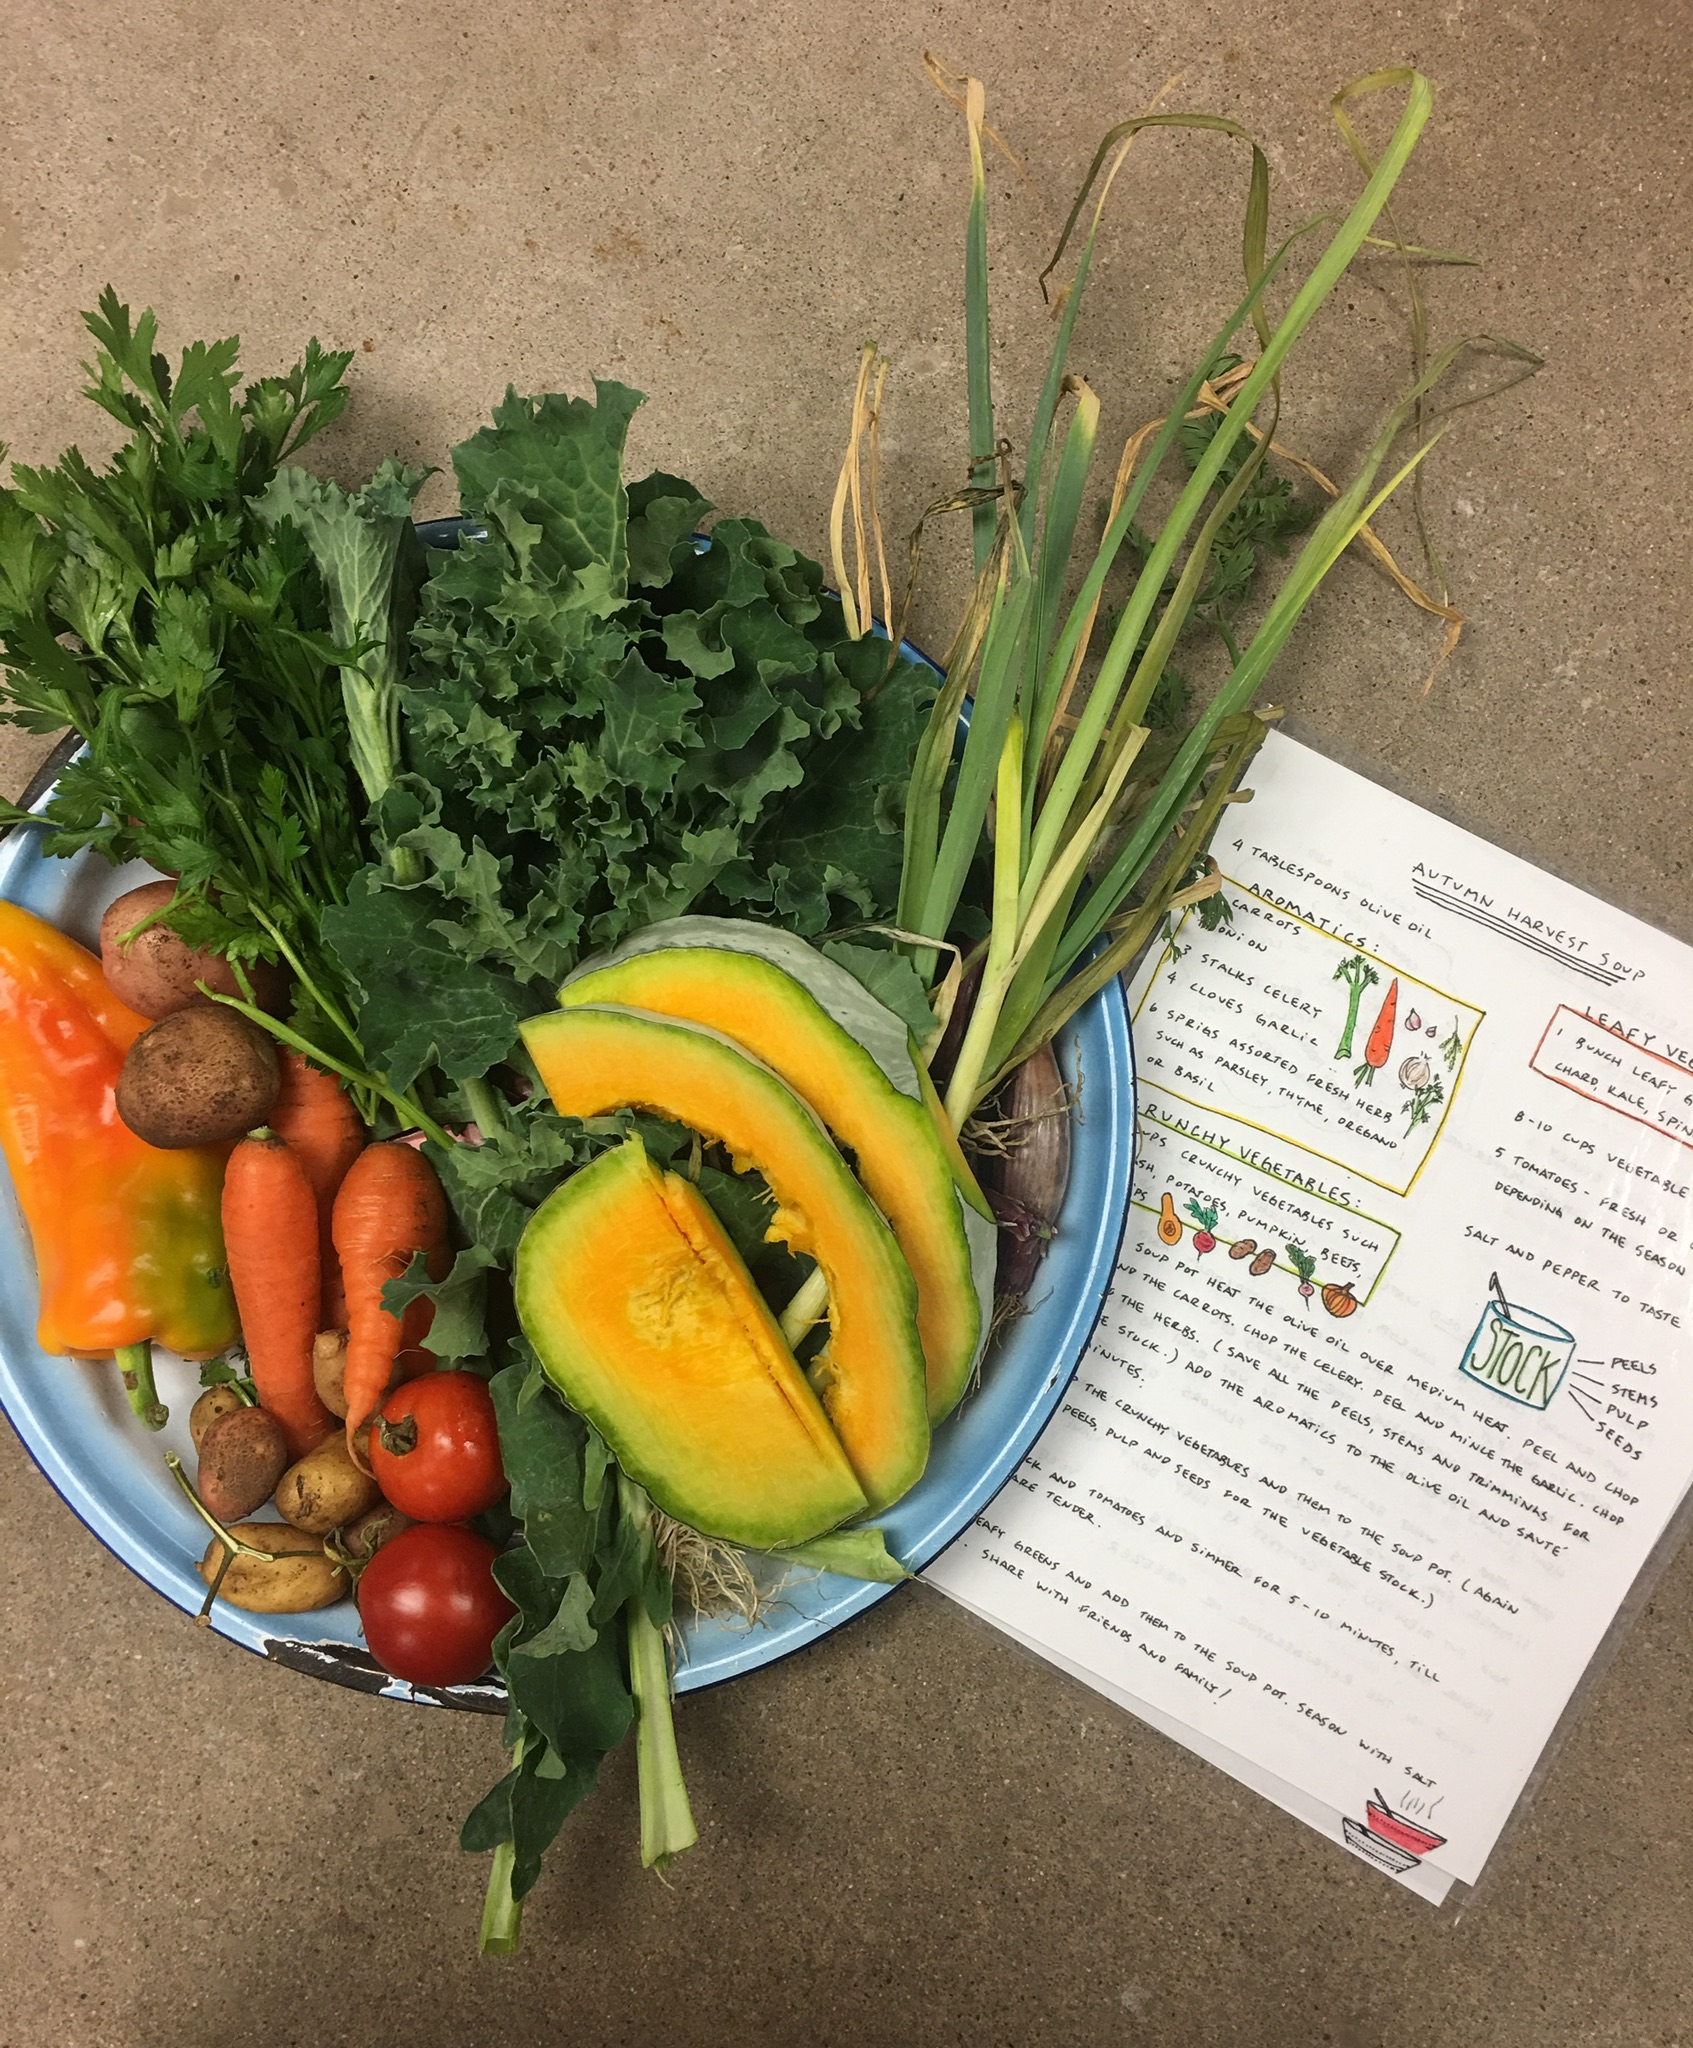
Lesson:
4/9
Standards Aligned:
Yes
Autumn Harvest Soup
Tags: 
Seasonality
Seasoning
Soup
Harvest
Flexible Recipes
Place of Learning: 
Duration: 
90 Minutes
Grade Level: 
Summary: 
In this sixth-grade lesson, students prepare a soup with vegetables harvested from the fall garden while they practice knife skills and learn the basics of making stock.
Student Learning Goals & Objectives: 

After this lesson, students will be able to:

  • Understand how to make vegetable stock.
  • Demonstrate basic knife skills and care.
  • Read and follow a recipe to make Autumn Harvest Soup.
  • Taste the soup and adjust seasoning.
Assessments: 

During this lesson, students will: 

  • Prepare the vegetables for the Autumn Harvest Soup, and sort the remaining parts for the stockpot or the compost 
  • Choose the proper tool for the job 
  • Follow the recipe to completion 
  • Taste and season the soup 
Materials & Prep: 
Ingredients
  • For the Autumn Harvest Soup
  • Olive oil
  • Leeks
  • Carrots
  • Celery
  • Garlic
  • Pumpkin
  • Winter squash
  • Assorted greens
  • Tomatoes
  • Thyme
  • Parsley
  • Vegetable stock
  • Chard
  • Tomatoes
  • Salt
  • Pepper
Equipment
  • Stove
 
Tools
  • 2 stockpots
  • Strainer
  • Garlic peeler
  • Wooden spoon
  • Ladle
  • Chef knives
  • Paring knives
  • Cutting boards
  • Measuring beaker
  • Measuring cups
  • Measuring spoons
For the Chef Meeting
  • Autumn Harvest Soup recipe – PDF
  • Ingredients and tools for demonstration
  • Visual aid – PDF
     
    Before You Begin
    • Collect all the tools and ingredients
    •  Distribute everything to the tables
    • Gather supplies for the Chef Meeting
    • Create the visual aid
    • Copy the Autumn Harvest Soup recipe to hand out
    • Prepare the vegetable stock (for the first class)
    • Warm vegetable stock on the griddle
     
        Procedure Steps: 
        FULL GROUP, 7-12 MINUTES
        1
        AT THE CHEF MEETING

        Welcome students and introduce the recipe.

        1. Explain that Autumn Harvest Soup is a seasonal recipe and that the largest harvest of the year is in the fall.
        2. Invite students to name vegetables that are in season based on what they've seen growing in the garden or the produce they see available at the store. Introduce the vegetables we will be using in the Autumn Harvest Soup.
        3. Describe the difference between a recipe that needs to be followed precisely and a recipe that is flexible, like Autumn Harvest Soup. A flexible recipe can be adjusted with what is in the garden or on hand.
        4. Explain that for the Autumn Harvest Soup recipe, although the specifics are flexible, we'll be making the soup by following a specific set of steps that helps to build the best flavor. First, we'll cook our aromatics, including onions, garlic, and herbs. This infuses the cooking oil with flavor and brings lots of flavor to the finished dish. Then we'll add the vegetables and cook them partially, so that they are all coated with the flavored oil. Then we'll add the stock and simmer to finish cooking the vegetables and allow the flavors to combine.
        5. Introduce the term “vegetable stock.” Explain that cold water heated slowly over low heat extracts flavor from the vegetables. Ask students to use the visual aid to identify which parts of the vegetables will be used for the soup, the stock, or put into the compost.
        6. Ask students to wash their hands and divide into their table groups.
        TABLE GROUPS, 60-70 MINUTES
        2
        AT THE TABLE

        Demonstrate how to cut different vegetable before students prepare Autumn Harvest Soup. 

        1. Break into table groups, and lead a small-group check-in. (What is your favorite kind of soup?)
        2. Refer to Greens over Grains to review that different vegetables and various parts of the same vegetable can cook at different rates. Divide vegetables into two categories, based on how long they take to cook. Explain that students will be using this concept to decide what size they cut the vegetables and what order they add them to the soup.
        3. Review the recipe, and demonstrate how to cut different vegetables.
        4. Assign jobs.
        5. Prepare the recipe.
        6. Ask students to taste the soup and adjust the seasoning. Demonstrate how to taste hygienically.
        7. Set the table; eat; clean up.
        FULL GROUP, 10 MINUTES
        3
        AT THE CLOSING CIRCLE

        Students discuss the recipe. 

        1. Ask students to use their hands to rate the soup on a scale of 1 to 5.
        2. If there is time: Ask students to share what their favorite vegetable in the soup was or how they would adjust the recipe if they were to make it at home.
        Vocabulary: 
        • Vegetable stock
        • Harvest
        • Dice
        • Ladle
          Teaching Notes: 
          • The Aromatics: This is an excellent lesson to introduce students to the concept of building flavor by starting any dish by cooking a basic mix of finely chopped vegetables, herbs, or spices in oil. It can be fun to compare the different ingredients commonly used in a variety of cuisines: mirepoix in France (carrots, celery, onions), soffrito or battuto in Italy (carrots, celery, onions, and often herbs or pancetta), suppengrun in Germany (carrots, celery root, leeks), the “holy trinity” of Cajun cooking (onion, celery, green bell pepper), and minced garlic, ginger, green onions, and spices in various Asian cuisines. Ask students to share if there are any basic ingredients that are frequently used in their kitchens at home.
          • Stock: We find that although it is a very simple job, students really enjoy making stock during this lesson. Encourage them to smell the stock and ask if they can identify what ingredients are in it based on the smell.
          • "Pay it forward" stock: Because making the stock takes several hours, teachers prepare an initial stock for the first class. Then students use the leftover trimmings from the chopped vegetables to prepare a new stock for the next class that comes in.
          • Jobs: We like to divide students into jobs by having them choose to work on aromatics, crunchy, or leafy vegetables. Because understanding these three basic categories is one of the main objectives in this lesson, we find that identifying which group they want to work with helps them to retain a better understanding of the different categories.
          • Knife Skills and Flavor: In addition to reflecting on how the density and size of a vegetable may affect its cooking rate, we also invite students to try cutting their vegetables in a couple different shapes and tasting them—does the shape of a vegetable affect its flavor? This type of exploration often gives students the confidence to make their own judgment calls about what size and shape they want to cut their vegetable. Student ownership of the recipe and cooking process is our goal.
          • Right Tool for the Job:  This is only the second lesson in which our students use knives, so we focus on supporting every student to understand how to choose the right tool for the job.
          • Knife Techniques: Depending on the skill level of a group, we’ll often review basic knife techniques (dicing, slicing, mincing) before breaking up into jobs.
          • Collaborative Process: We like to emphasize with students that making the soup will be a group process (“We’re all working on parts of a recipe. You may not see the whole thing through”). This is a helpful reminder for some students to make sure everyone gets a chance at the stove and everyone takes a turn at the sink.
          • Tasting Hygienically: This lesson is an excellent opportunity to demonstrate to students how to taste hygienically, by putting some of the soup from a serving spoon onto their own personal tasting spoon, as opposed to dipping their tasting spoon into the soup pot.
          • Tasting and Group Decision-making: This is a chance to practice group decision-making around how to season the soup before eating it. We like to gather the whole group around the stove with tasting spoons and have the teacher serve small tasting portions onto personal spoons with a serving spoon. Everyone tastes, and then holds up their fingers, 1 to 5, to indicate how much salt they want to add. Do this for a couple rounds. Emphasize that you can always add salt or spice, but you can’t take it out.
          • Hot Sauce Diversity: We make multiple hot sauces available to our students during this lesson (e.g. Crystal, Tapatío, Cholula, Sriracha). Students often identify very strongly with one or two hot sauces and are very happy to see their own hot sauce. This is an opportunity for students to see themselves represented in the space.

          Academic Standards

          Common Core State Standards

          English Language Arts and Literacy, Grade 6

          RI.6.7

          Integrate information presented in different media or formats (e.g., visually, quantitatively) as well as in words to develop a coherent understanding of a topic or issue.

          Edible Schoolyard Standards

          In the Kitchen Classroom, Grade 6

          Terms & Techniques

          2.6

          Read and follow recipes, and understand that some recipes are flexible and some are specific.

          2.7

          Taste finished dishes and discuss their sensory observations using descriptive vocabulary.

          Tools

          1.3

          Identify different knives from the ESY Toolbox and demonstrate basic knife skills, safety, and care with guidance.

          Contributors: 

          All lessons at the Edible Schoolyard Berkeley are a collaboration between the teachers and staff of the Edible Schoolyard and Martin Luther King, Jr. Middle School.